Nowadays, with the development of cryptocurrencies, people are getting used to using them for payments, which leads to merchants needing to add Bitcoin payment to a website.
Hereby, XAIGate will give you 5 steps to add Bitcoin payment to a website for merchants to get in touch with the benefit of using cryptocurrencies.
Contents
Why do we need to add Bitcoin payment to a website?
To find out the reasons, we need to understand about cryptocurrencies first.
A cryptocurrency is a type of digital or virtual currency that uses cryptography for security, which makes it difficult to counterfeit or double spend, and doesn’t like fiat currencies (traditional currencies released by the government), cryptocurrency running on a decentralized system using blockchain technology.
The main characteristic of cryptocurrency is not governed by any central authority, such as a bank or government, the responsibility is shared among users, which is why users can transfer assets directly without intermediaries.
Bitcoin is the first and most well-known cryptocurrency, created by an anonymous person or group known as Satoshi Nakamoto in 2009, and because of its limited volume and store of value properties, Bitcoin is considered as Gold of the cryptocurrency world.
As long as cryptocurrency has its value, users can use it as a payment method to exchange goods and services, especially on e-commercial.
In the last 4 years, the world changed its shopping style from direct to online with more and more e-commercial platforms, and the need to use cryptocurrencies for payment has increased multiple times.
That is why merchants need to add Bitcoin payment to a website, so they can increase their user’s experience up to date and get to have more income from the website.
How many ways to Add Bitcoin Payment to a Website?
There are 3 ways to add Bitcoin payment to a website.
1. Using a third-party payment gateway or processors
This is one of the easiest ways to add Bitcoin payment to a website, suitable for those who do not want to handle technical details by themselves.
These platforms are fiat-to-crypto payment gateways or processors like XAIGate.
2. Direct payment with a Bitcoin wallet or Add-on Button
Let your users pay directly to you through a direct payment method, using your own Bitcoin wallet’s address or custom it to a personality Button on the site.
3. Implementing Custom Integration via APIs
This is the most flexible way to add Bitcoin payment to a website but also requires high-level technical skills to develop it.
In this post, we will share the step-by-step instructions to add Bitcoin payment to a website by using a third-party payment gateway.
5 Steps to Add Bitcoin Payment To a Website by Using XAIGate Payment Gateway
XAIGate is considered the best cryptocurrency payment gateway since 2024 with its secure, user-friendly, and reliable features.
To be defined as the best fiat-to-crypto payment gateway, XAIGate was designed with:
- Low Crypto Processing Fee
- No Monthly Cost
- Easy to Setup
- Invoice Services
- Global Payments
- Secure Transactions
- Affiliation Program
- 24/7 customer support
- Gas Station
There are a lot of reasons why businesses choose XAIGate as their cryptocurrency payment gateway, here are just a few:
To increase sales:
Accepting cryptocurrency payments can help businesses increase sales by attracting new customers and making it easier for existing customers to pay for goods and services.
To expand their global reach:
Cryptocurrency payments can be accepted by customers all over the world, which can help businesses expand their global reach and reach new customers.
To reduce costs:
Cryptocurrency payments are processed much faster than traditional payments, which can save businesses money on processing fees.
To protect their business from fraud:
XAIGate uses advanced security measures to protect businesses from fraud and theft.
Follow the steps below to add Bitcoin payment to a website with XAIGate payment gateway on WordPress.
Step 1: Installation of XAIGate Gateway Plugin
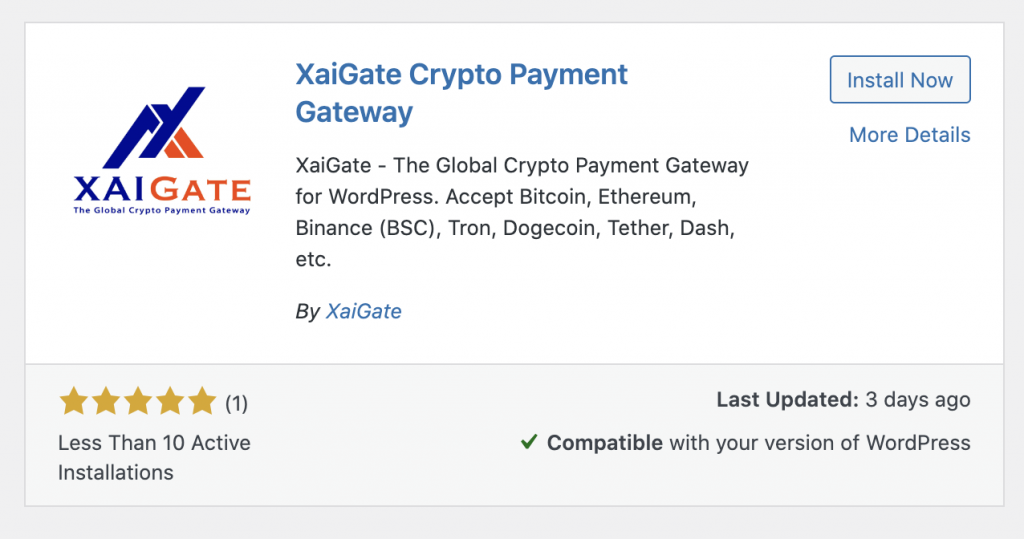
First, you must install XAIGate crypto payment gateway WooCommerce plugin and activate it.
- Click on the “Plugin” option (you will find it on the sidebar).
- Then select the “Add New” option (you will find it at the top of the page) or you can download at Cryptocurrency Payment Gateway – WordPress plugin and upload the plugin to your website.
- A new page will pop up and show you different plugins, you must click on the search option and type XAIGate Crypto Payment Gateway.
- After finding the XAIGate plugin, click on the “Install Now” button and install the plugin.
- Click on “Active” to activate our plugin, and then you will see the XAIGate icon appear on the sidebar.
Congratulations! At this stage, you have successfully installed our plugin on your website.
Step 2: Configuration of XAIGATE Crypto Payment Gateway WordPress
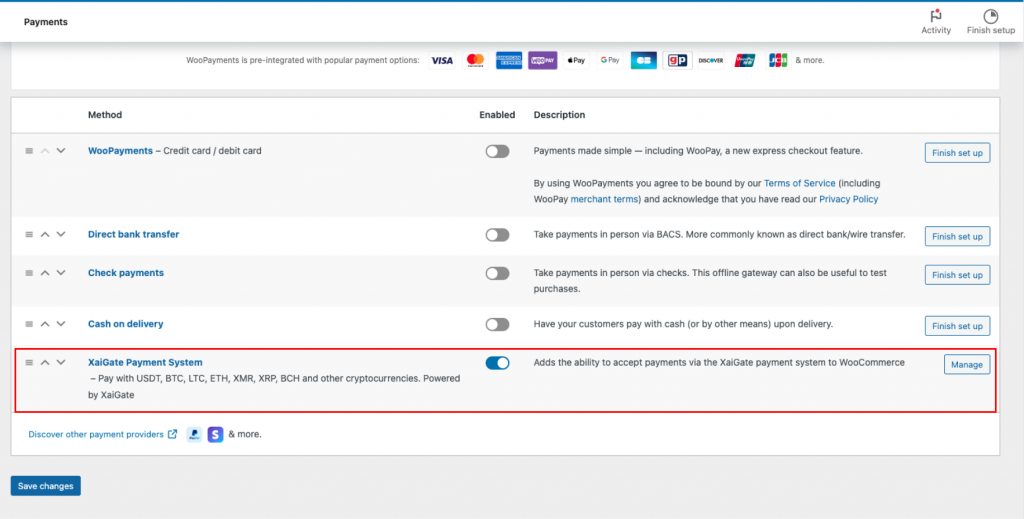
- Go to the sidebar of WordPress’s admin panel.
- Click the WooCommerce option and select Settings.
- Now, you will need to locate the Payments section in Settings.
- You’ll find the XAIGate plugin there.
- Click Manage at the end of the same line.
The configure settings page will be opened.
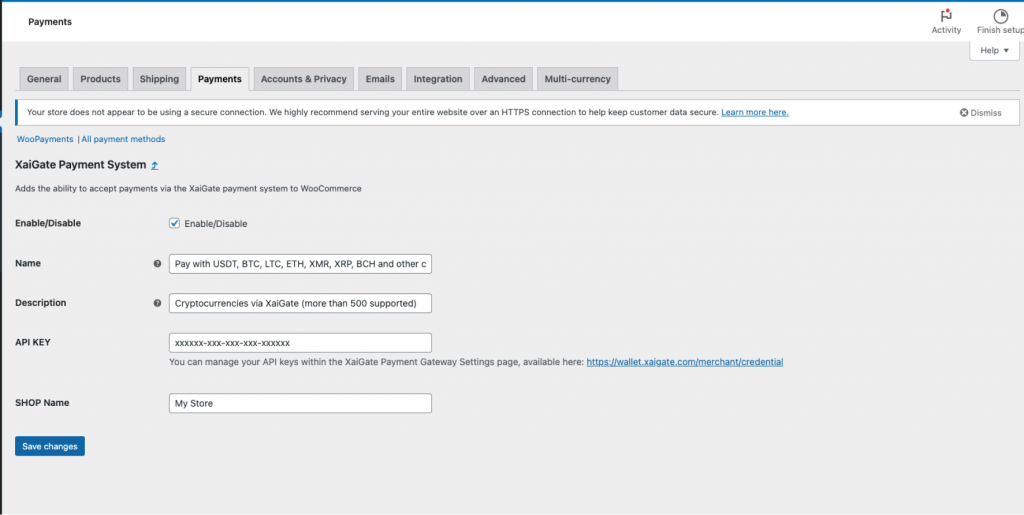
- Enable/Disable: Tick the checkbox if you want to enable the XAIGate payment method.
- Title: The title written by you will appear on the checkout page.
- Description: You can add a few details to tell users important details before they proceed to the checkout page.
- APIKey: You’ll need to obtain an API Key from your XAIGate project settings.
Access the Credential page of your XAIGate dashboard to retrieve your API Key here: https://wallet.xaigate.com/merchant/credential. - Shop name: Enter your shop name.
And, that’s all for setting up. Save the setting!
Step 3: Setting up a shortcode
To ensure that the WooCommerce plugin functions correctly, the final step is to place a shortcode block, this is a brief snippet of code designed for WordPress, allowing you to embed files or create objects on your website or blog.
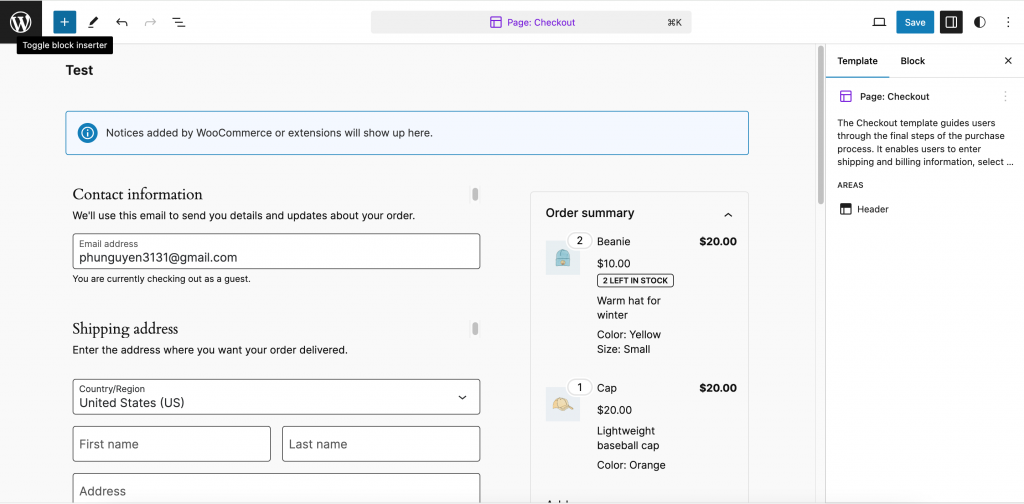
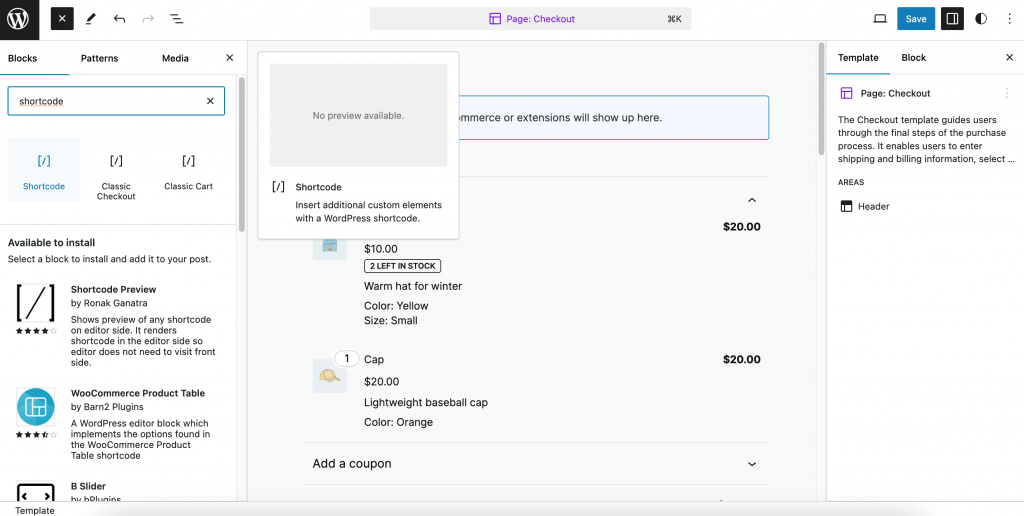
- Go to your Checkout page editor by clicking Edit Page
- Delete the Checkout block by using the element navigator
- Once inside the page editor click on + and add a shortcode block
- Type woocommerce_checkout into the added shortcode block so that the result is: [woocommerce_checkout]
- Update the changes
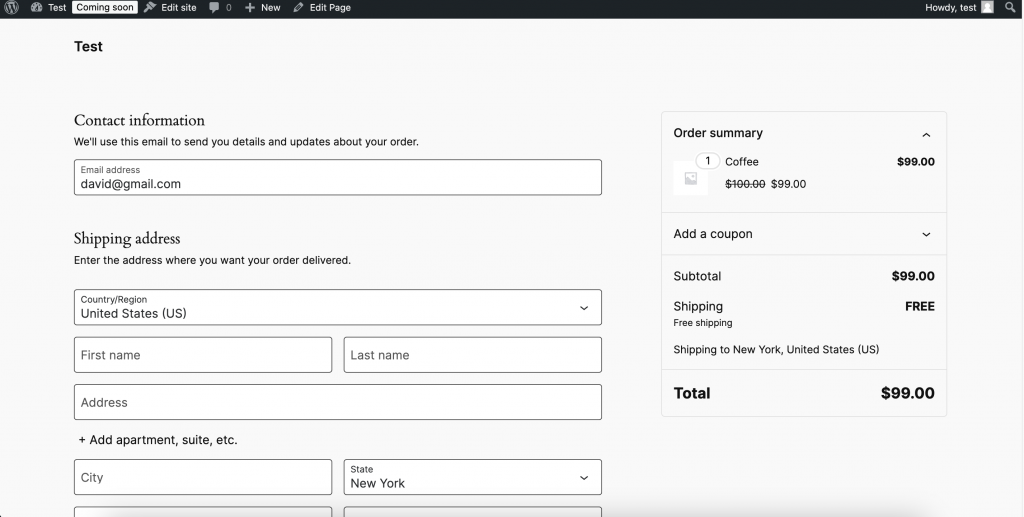
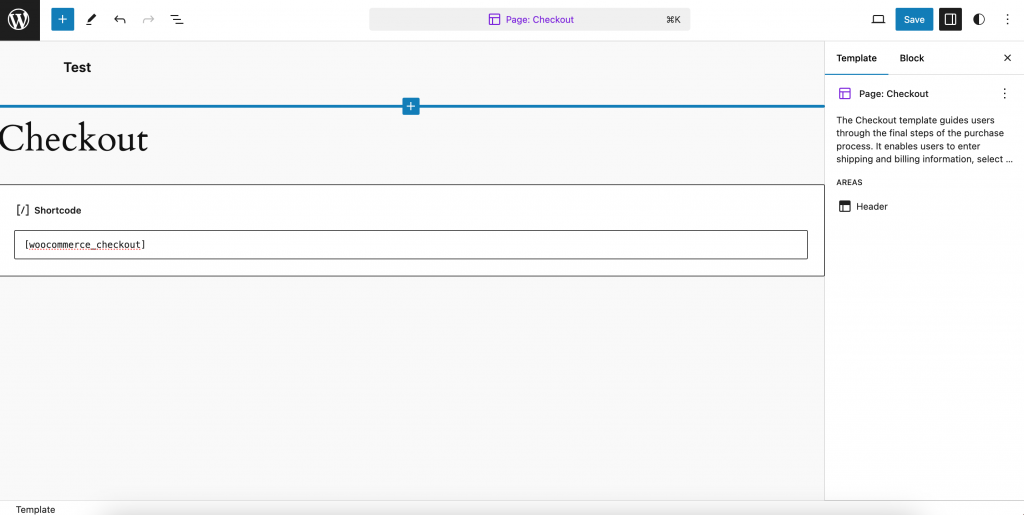
Complete! To ensure everything is functioning correctly, consider conducting some test payments. Incoming cryptocurrency funds will be credited to your merchant account.
Step 4: How to make payment
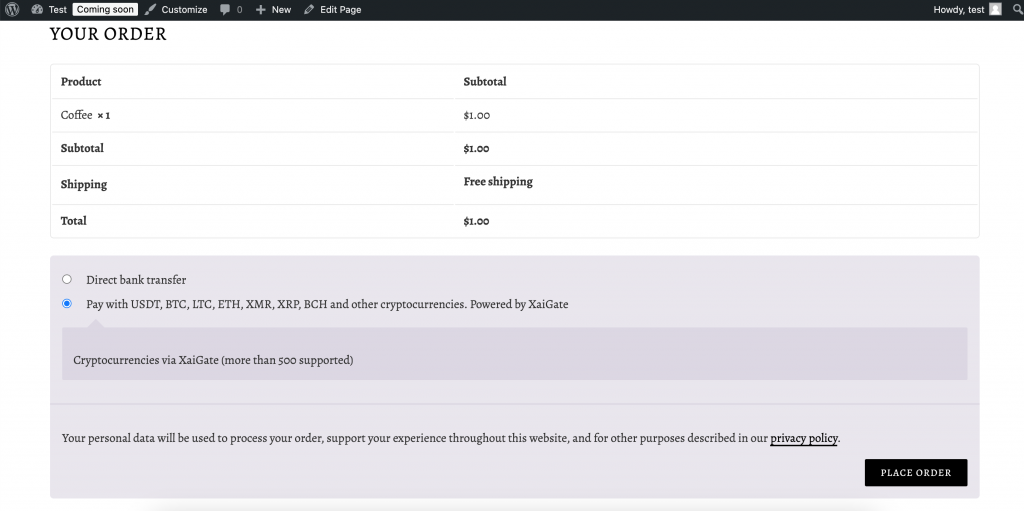
Once a customer fills in the required details and places an order for a product, the system will direct them to the payment page.
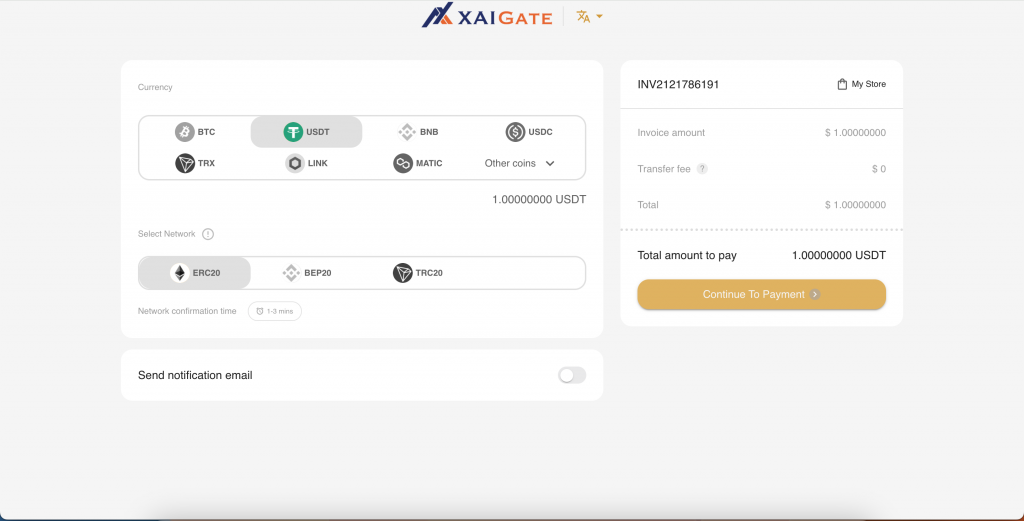
On this page, you will have the option to pay using various cryptocurrencies, including USDT, BTC, LTC, ETH, XMR, XRP, BCH, and more. Please select your preferred option.
Next, choose one of your coin wallets to complete the payment for the product, and then click “Place Order.”
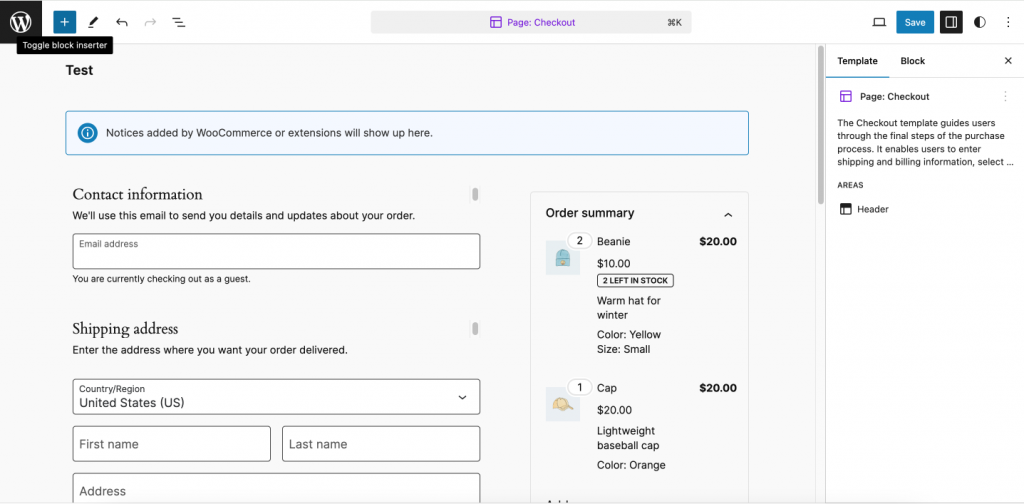
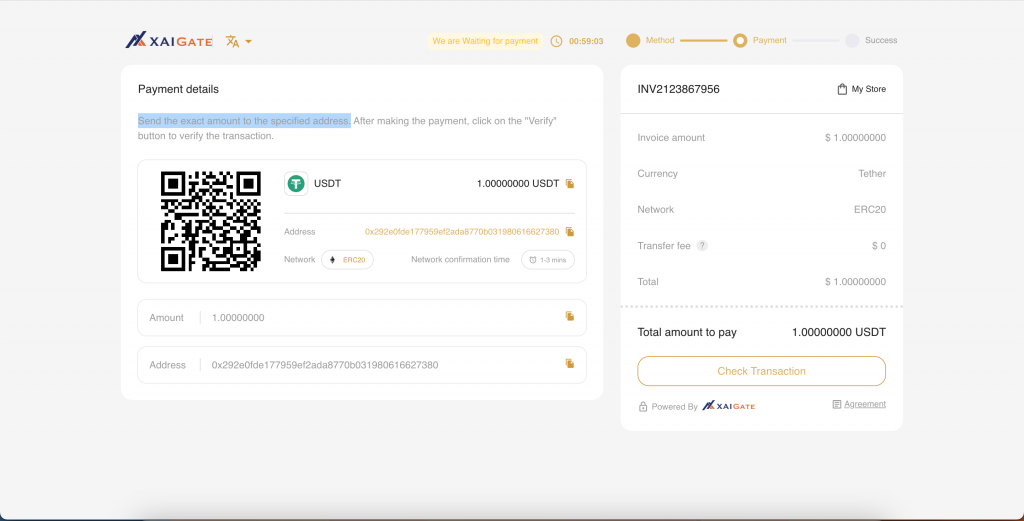
Immediately after, the system will automatically generate an invoice that will appear on your screen. Copy the payment address from the generated invoice and transfer the exact amount from your wallet.
Once you send the payment to this address, it will require three confirmations on the blockchain to mark the order as paid.
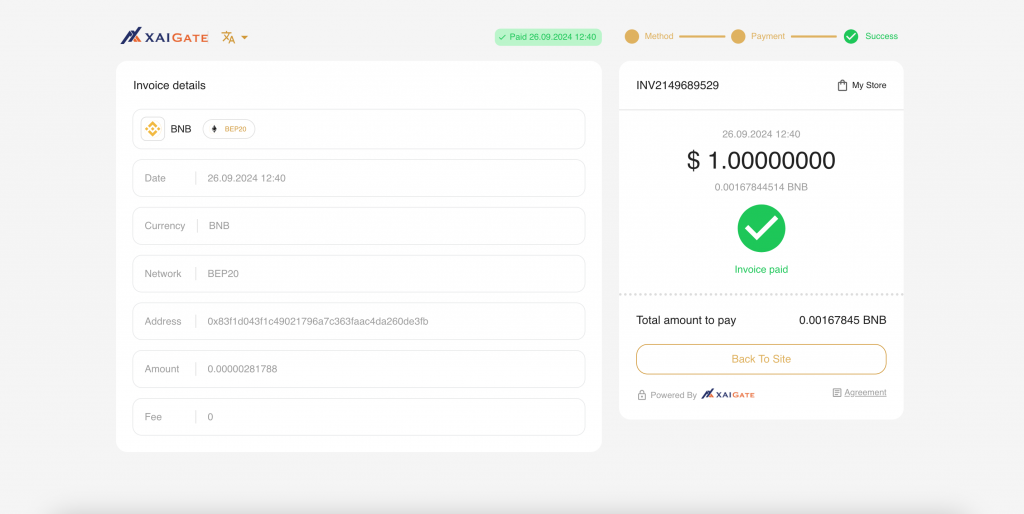
After the payment is confirmed, you will be automatically redirected to the order summary page.
Congratulations! You have successfully paid for your product.
Step 5: Check order details
To check your orders, go to the sidebar in the Admin panel.
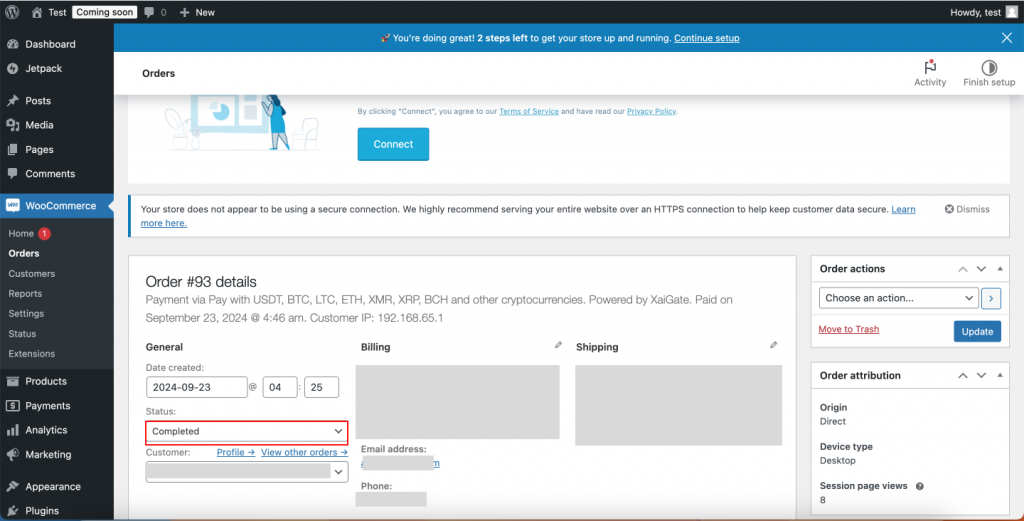
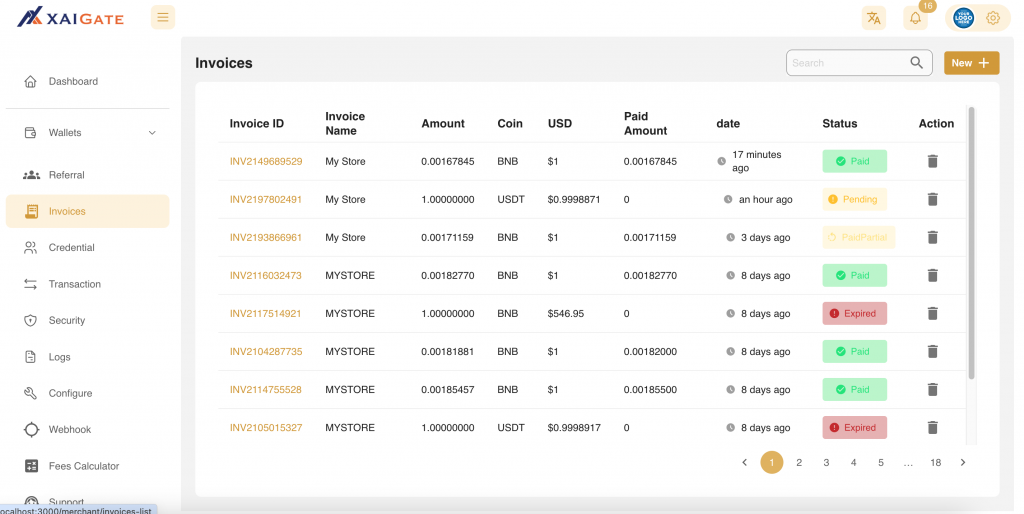
1. Select “Orders” from the order menu. After clicking on it, you will see a complete list of your orders.
2. Click on any order that was paid using the Xaigate payment option.
3. You will be redirected to the order view page, where you can see the details of the order, including conversion rates and payment history.
Additionally, you can view all orders in your XAIGate dashboard.
With 5 simple steps, merchant owners can easily add Bitcoin Payment to a Website with XAIGate – The best crypto payment gateway since 2024.
Hopefully, through this article, everyone can add Bitcoin Payment to a Website to increase their business with the greatest best crypto payment gateway platform.
Don’t forget that we have 24/7 support for customers, please contact us if you get stuck in any steps.


 Start Accepting Crypto Payments today!